One of the things we love about Showit is that it allows you to customize your page titles and descriptions within the builder. I wanted to do a tutorial on this topic because we see a lot of confusion, specifically with the terminology surrounding these features.
Meta titles… What are they?
The question we see most often is, “How do I get Google to update what it shows when you search for my business?” This is called a meta title (also known as a title tag).
This question is usually accompanied by a screenshot that looks something like this:

Luckily, Showit makes it SUPER easy to update this information, you just have to know where to find it. 🧐 So today, we’re going to tell you everything there is to know about this behind-the-scenes yet ever so important piece of the SEO puzzle.
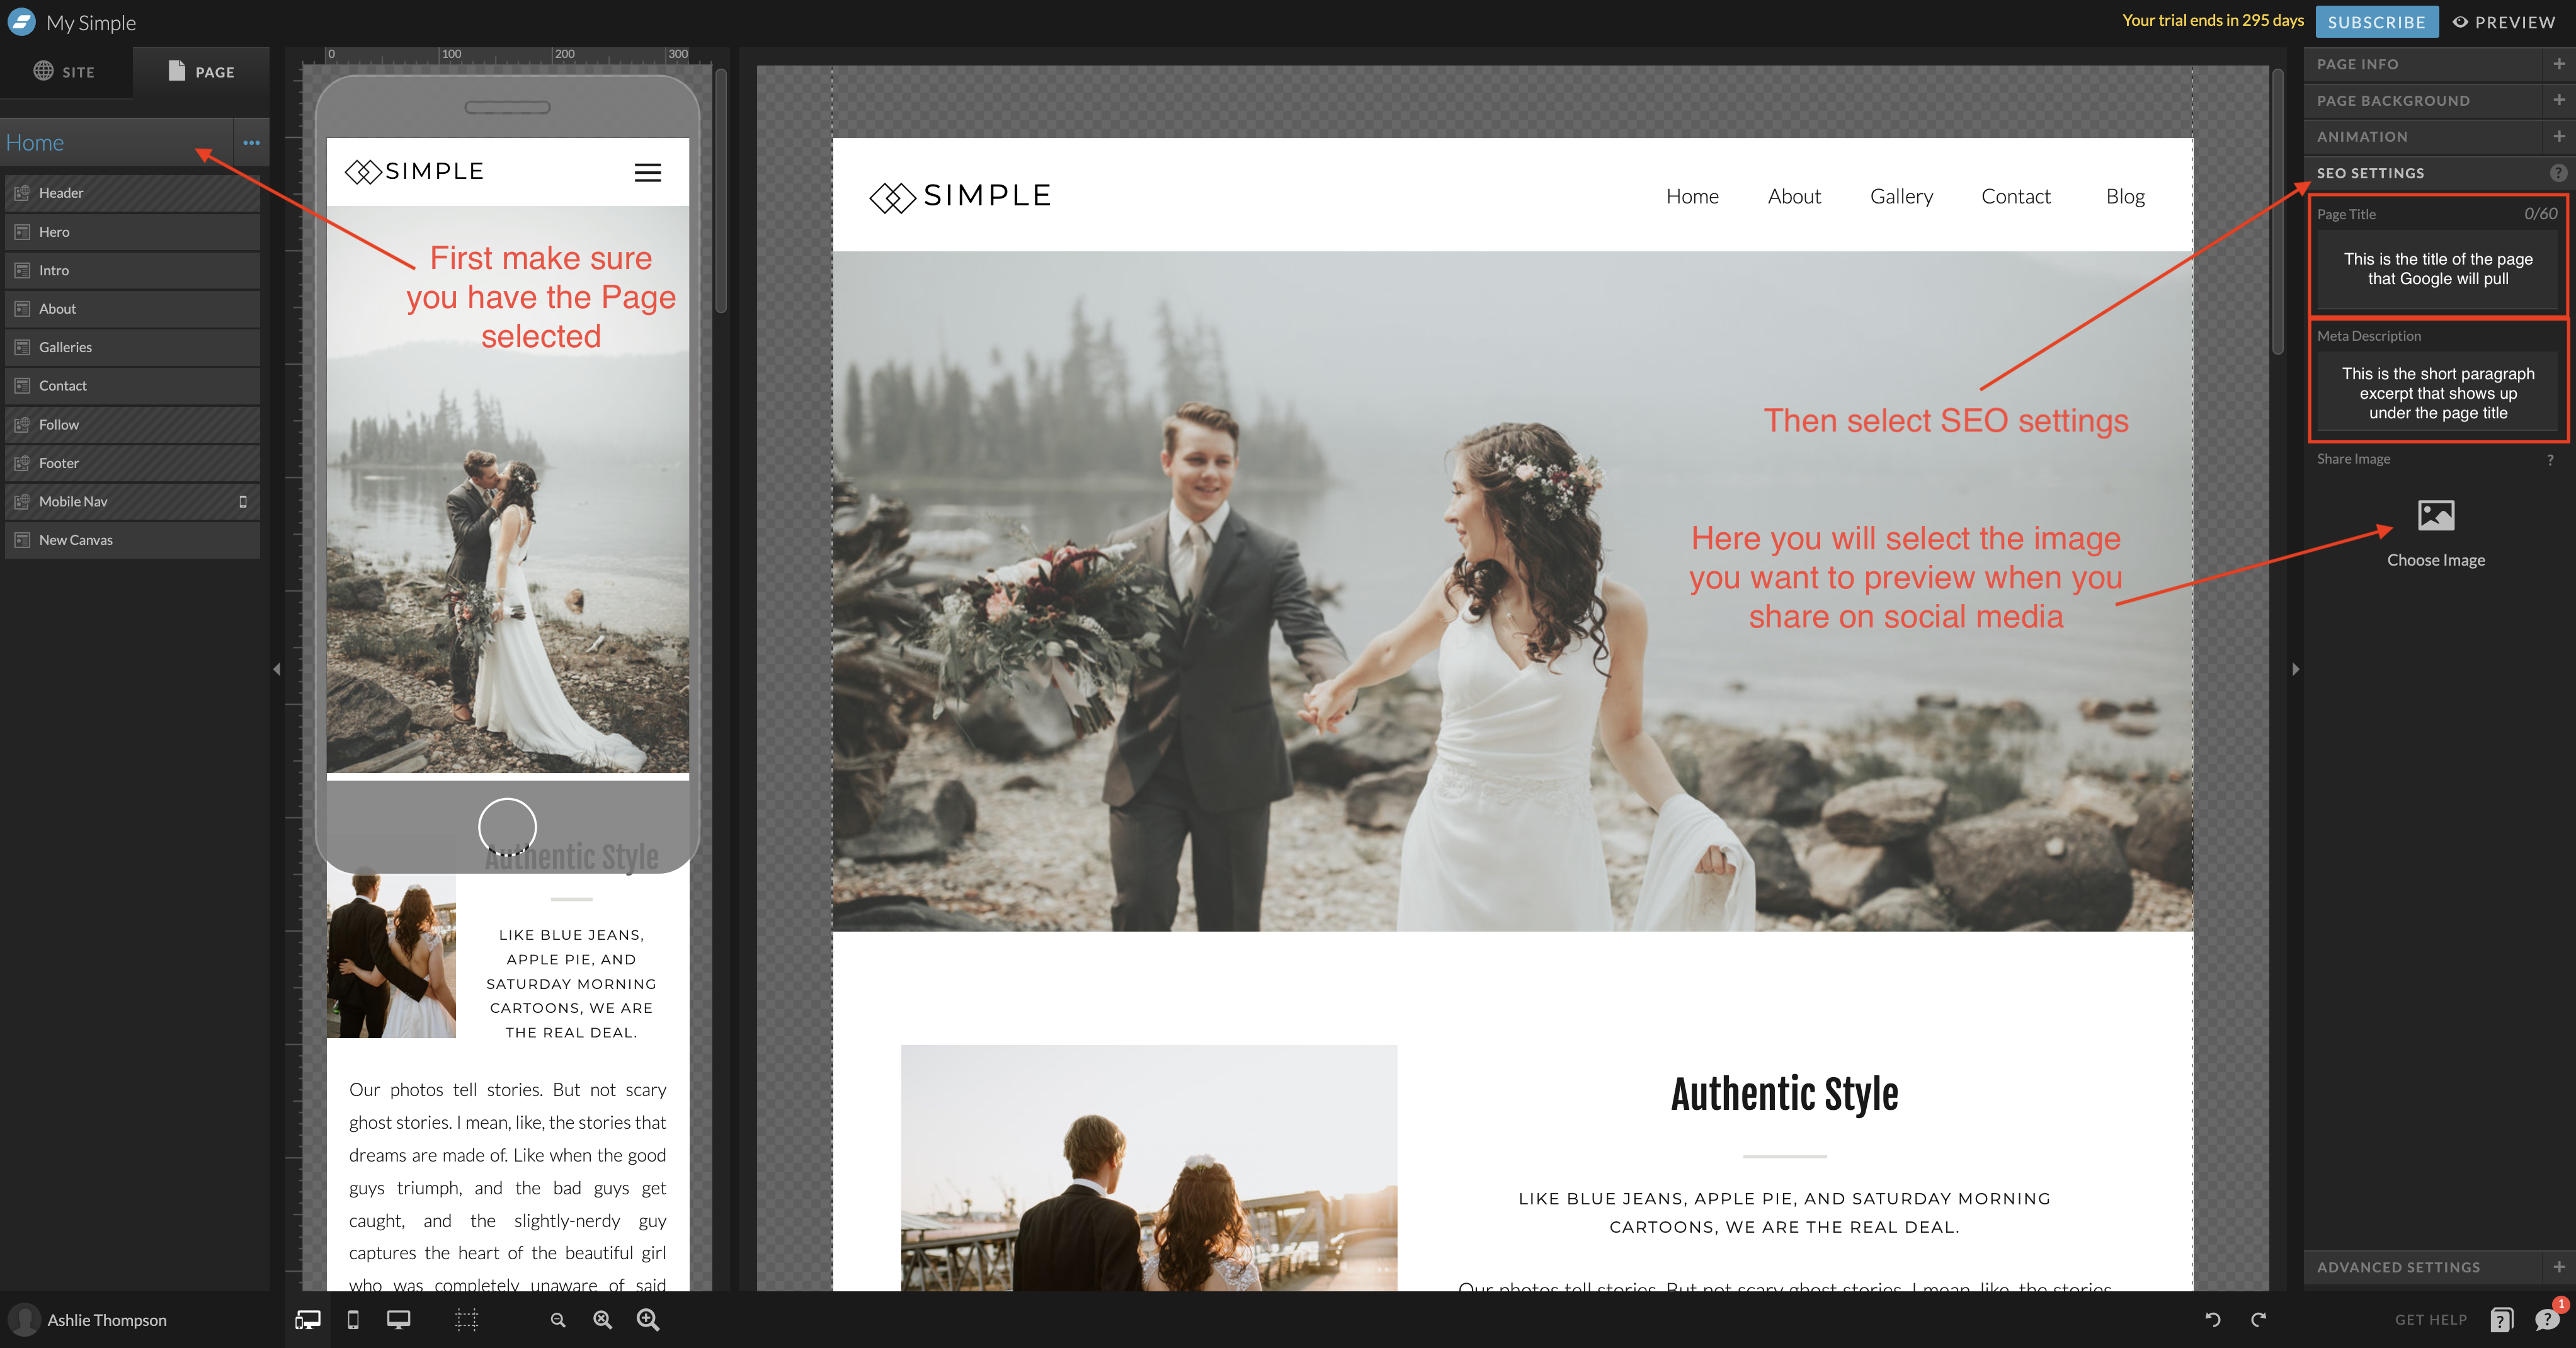
Where to find page settings in Showit to change descriptions and titles
The first step is understanding where to find your page settings in the Showit builder. The page settings are where you’re going to update your meta titles and meta descriptions (more on that in just a bit).
Here’s a screenshot to help you navigate your settings:

Important note: If you’re switching your website from another platform to Showit, you’re updating the page title, or updating a description for an existing domain/business, it’ll take time for Google to re-crawl your website and pull that new data. In other words, most changes won’t be immediate. There are ways you can speed up the process, but we’ll cover that in another blog post. 😉
Understanding your page titles
Let’s demystify some of the jargon you may have heard associated with page titles, AKA this SEO powerhouse. The page title may also be called the SEO title, Meta title, or, in many cases, the title tag.
As the name implies, the page title is the overarching title for each of your web pages, and it’s the first thing that Google outputs on a search page. Although it’s short, the page title is extremely important for SEO. This tiny but mighty title is the first indicator for Google on what the page is about — making sure it’s clear, concise, and descriptive (not too creative) is super important.
While there are a lot of nitty-gritty details we could get into to make sure you have a kick-ass page title, we’ll just focus on the overarching general best practices for now:
- A great page title will typically start with a brief description of what you do (it can be your business or site name), followed by one or two powerful keywords. If your business is location-specific, it’s a good idea to also include that at the end of your page title.
- Your page title should be short enough to be visibly read in a Google search, but strategic and descriptive enough to entice searchers to click on the link.
This brings us to the next important metadata, meta descriptions.
Getting familiar with meta descriptions
Technically speaking, the meta description is a longer HTML tag than your page title that describes the content of your web page. This means you have two lines of valuable real estate to engage potential visitors and get them to click on your website.
Two lines are not a lot in the grand scheme of things, which is why it’s so important to approach them carefully and strategically. You should include a call to action, appeal to an emotional pain point, and address a specific benefit for them to click through.
The easiest way to approach the meta description is to do your keyword research and then incorporate those keywords in two short but impactful sentences.
How to change the share image
We also get this question a lot: “Where do I update the image that pulls when I share a URL to my website on social media?” This setting is called your share image and you can find it within the SEO settings of each page. (Reference the first screenshot in this blog post.)
We recommend choosing an image used on the current page as the share image for that page. We also recommend choosing horizontal images with primarily centered content to ensure legibility when sharing.
Bonus tip: You may notice that even after updating, Facebook or other social media platforms still pull your old image. There’s a trick for that!
The Facebook debugger tool allows you to push a crawl of your site to update the data. You can find the tool HERE. (And bookmark the link because you’ll likely use it in the future!) The tool is super easy to use. Simply input the URL you’d like to update (you’ll need to grab the URL specific to each page to get them to update) and click Debug.
That’s it! The tool should crawl your website data and show you a preview of the new share preview.
Was this helpful?
Do you still have more questions or need help? Pop it in our DMs!


